Boost Gauge
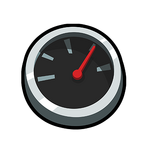
Every vehicle has a Boost Gauge in the bottom center which indicates the current boost pressure. The dial will raise from zero to full as long as you hold down the accelerator uninterrupted. Releasing the accelerator or braking will decrease boost, even in the air. Depending on what level you have the Engine upgraded to for the vehicle you're using, the maximum pressure for the boost gauge will vary. You will also notice that the higher the Engine level is, the louder the boost will be on each vehicle. Typically, the engine makes a hissing sound while the boost is on, and makes a whining sound when you turn the boost off. This helps determine the Boost power and how fast or slow each boost is.
Note: On Monster Truck, Super Diesel, Rock Bouncer and Rally Car, you will need to upgrade the Turbo separately from the Engine. On Hot Rod and Muscle Car, you will need to upgrade the Supercharger separately from the Engine. If you hold the gas down long enough on the Hot Rod it will start to destroy the engine.
Once the boost gauge is full, the needle will eventually begin to shake if you have the Epic Tuning Part "Overcharged Turbo" equipped. This means that the boost pressure is close to release. Shortly after this, if the needle doesn't go below 7/8 of full boost, the boost pressure will release and your Overcharged Turbo will engage, giving you a boost of speed.
After releasing the boost pressure via your Overcharged Turbo, the needle will need to go below the aforementioned 7/8 mark in order to begin charging your turbo boost again. This works unlimited times, but it takes every vehicle a different amount of time to charge an overcharged turbo because the engine is revving up at a different rate.
On Super Diesel and Monowheel, the Boost begins to charge to its halfway point when revving the engine before the start of a race, so getting an Overcharged Turbo boost will take less time, and the launch will also be faster.
The vehicles Tractor and Racing Truck take a longer time to get to max boost, so getting an Overcharged Turbo boost will take longer. Letting go of pressure for even a couple tenths on the Tractor will make you almost have to start all over.
When you charge up the boost with the Super Diesel or the Racing Truck and your needle stops charging the Overcharged Turbo, you will have to release the gas for ~0.2 seconds and your Overcharged Turbo will resume charging for boost.
Note: Without the tuning part Overcharged Turbo equipped, there is no way to release the boost pressure and you will not receive any speed boost for hitting max boost pressure. The Hot Rod, CC-EV, and Moonlander don't have the Overcharged Turbo Tuning Part, so you cannot get a pressure boost in any way. However, the Hot Rod is unique because holding the accelerator down (but not the brake) will make the Boost Gauge and the screen turn red, and the boost gauge will begin to shake violently. Do not hold the accelerator too long or else the supercharger will blow up. Doing this three times will cause the driver to be sent flying which will result in a driver down.
RPM Gauge
Every vehicle also has an RPM (Revolutions Per Minute) Gauge that displays the speed of a vehicle. The RPM gauge is something all vehicles have to display how fast or slow the engine is running at and the amount of power being put into the wheels, describing the Revolutions the wheels spin per minute. All vehicles have unique amount of RPM based on how fast the wheels turn.
Additionally, when you upgrade Engine, you upgrade the speed of the vehicle. Now your vehicle can send more power to the ground to climb hills, accelerate, and do more functionalities. The Boost Gauge (See Above) also increases when you have a connected Turbo to the Engine. Each vehicle's RPM Gauge move at a certain rate based on how the vehicle is affected by hills, bumps, and slopes.
Upgrading Grip also improves the power delivery to the ground, making the RPM decrease when the pedals are pressed, as when the grip is lower, the wheels will spin more, trying to deliver power from the vehicle to the ground, resulting in higher RPM rates.
Suspension and Wheel-Drive types can also affect RPM. Weaker and bouncier suspension will change the wheels' spin rate, changing the RPM. Firm suspension will not constantly change the wheels' spin rate, not changing the RPM. 2-wheel drive vehicles will have significant power sent only to the front or rear wheels, making the opposing wheels struggle, resulting in Higher RPM. 4-wheel drive vehicles will have better balance to all wheels, allowing the RPM to stay at a certain rate.
Additionally, certain Tuning Parts can affect the Revolutions the wheels spin at as well.
Coin Boost can increase the vehicle's speed up to 20, allowing for a large boost to climb hills, jump longer distances, or jump ahead of other players.
Overcharged Turbo can increase the vehicle's speed up to 75, allowing for a giant boost to jump way ahead of players, fly over dips and pits, and so much more.
Afterburner increases the vehicle's speed up to 3.50, allowing for an overall faster vehicle in races, but with higher fuel consumption.
Fume Boost can even increase the vehicle speed when used on flat surfaces when used on certain vehicles with better Fume Boost than others.
It's important to pay attention to the RPM Gauge, as it will determine how fast you are going in different situations. Here is some extra information.
Hill Climber's upgradeable AWD system will help increase the RPM for handling bumps and larger hills, and also increase the acceleration for going forwards and backwards.
Bus has a hard time when increasing the RPM, as the vehicle is really big and heavy, but when you fully break the bus, parts like Overcharged Turbo become more effective at providing a Boost to the RPM.
Vehicles like Motocross, Sports Car, and Racing Truck have slower accelerations, so the RPM will rise slower.
Motocross, Dune Buggy, and Superbike all have rear-wheel drive systems, so these vehicles rely on the rear wheels to do the work. This also means that the RPM is counted by the rear wheels, not the front ones. These vehicles (especially Dune Buggy) struggle going backwards.
Monowheel is the only vehicle that still has a functional Engine when you run out of fuel. The RPM will still increase and decrease while the vehicle is moving, even without fuel. Monowheel is also the only vehicle that has a wheel that struggles to turn while climbing hills. The vehicle is better at climbing when you use Fume Boost, Overcharged Turbo, or Coin Boost.
When you detach the main cabin from the wheels on Moonlander, you are disabling RPM altogether, as you don't have wheels to run, and the engine cannot power anything, so Thrusters is the only functional part when you do this. Thrusters and B.R.A.I.N must be at Lvl 20 to do this.
